Crop product image for AI video: from phone screenshot to clean photo
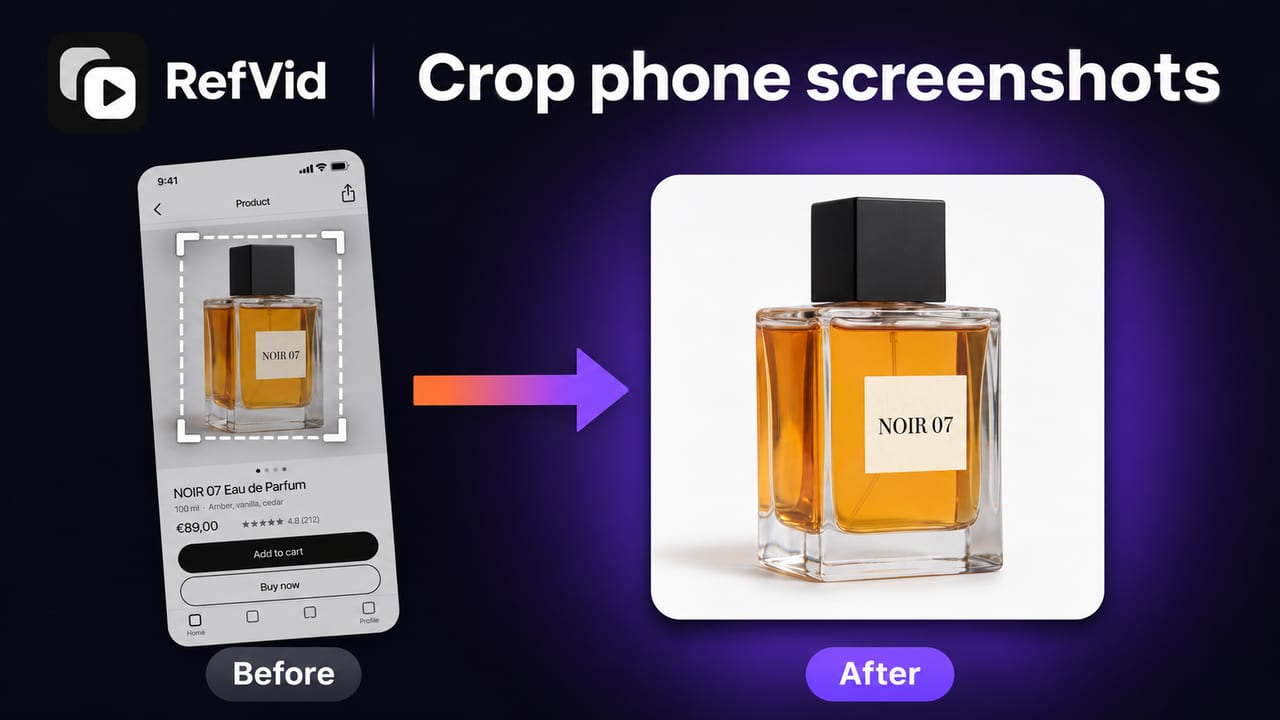
Turn your own photos into videos in minutes · Your first video is free, no watermark





First video free, no card
A phone screenshot of a product carries the status bar, the app's buttons and the price, and the AI video picks them up. Cropping the photo down to the product keeps the subject clean and the same in every shot, because the video model sees the cropped photo, not the original. This three-minute tutorial shows RefVid's crop tool from start to finish; every step is written out below with its own screenshot.
Chapters
How to crop a product photo in RefVid
- 1
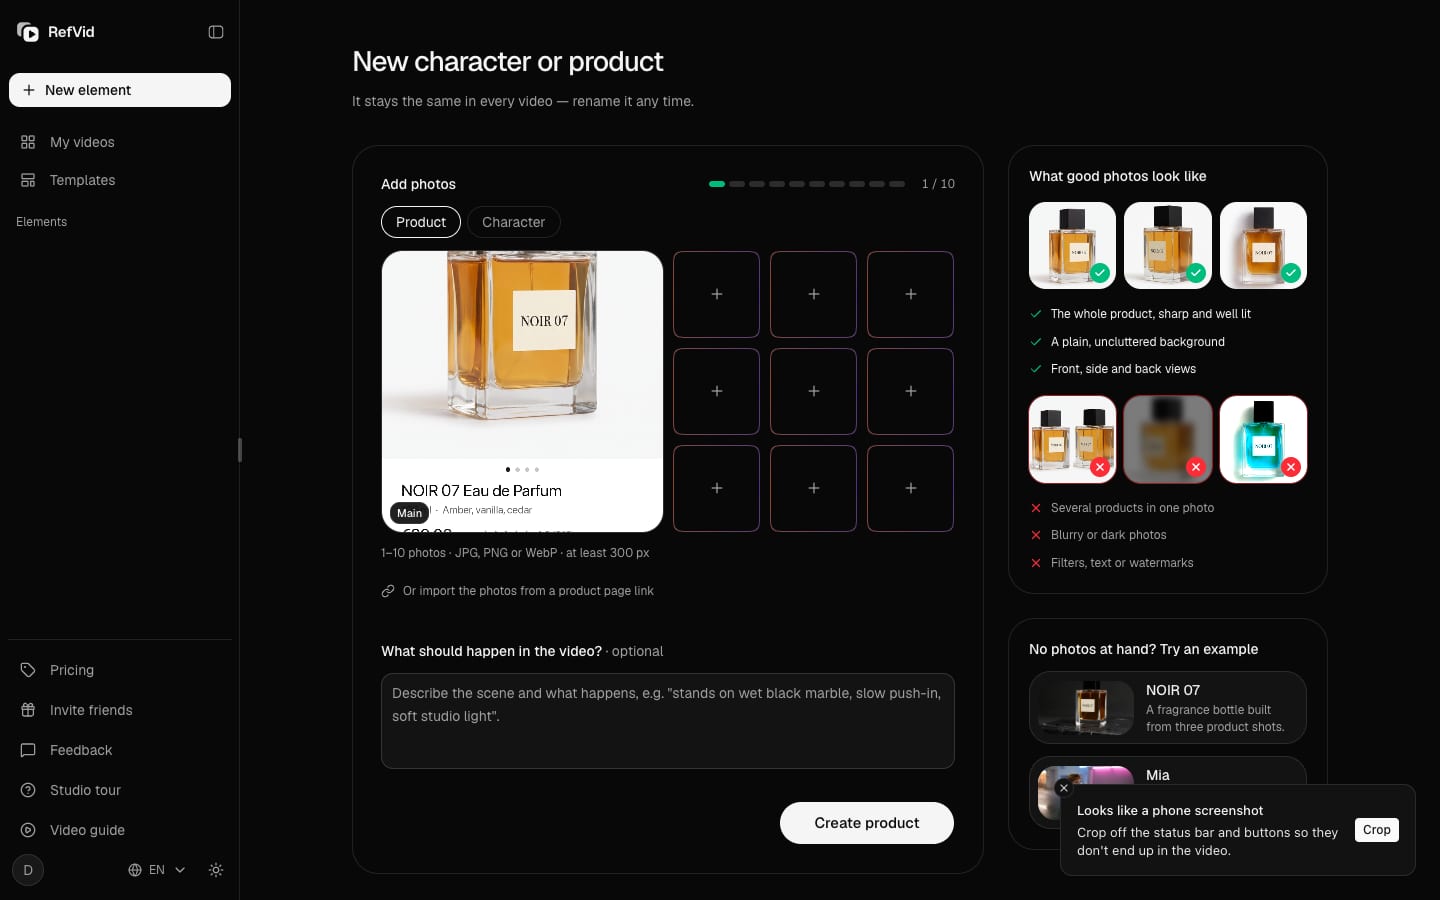
Add the photo, or paste it
In the studio, click New element and add a product photo, or paste one with Cmd+V (Ctrl+V on Windows). When a photo has a phone screenshot's shape, RefVid says so and offers Crop.
- 2
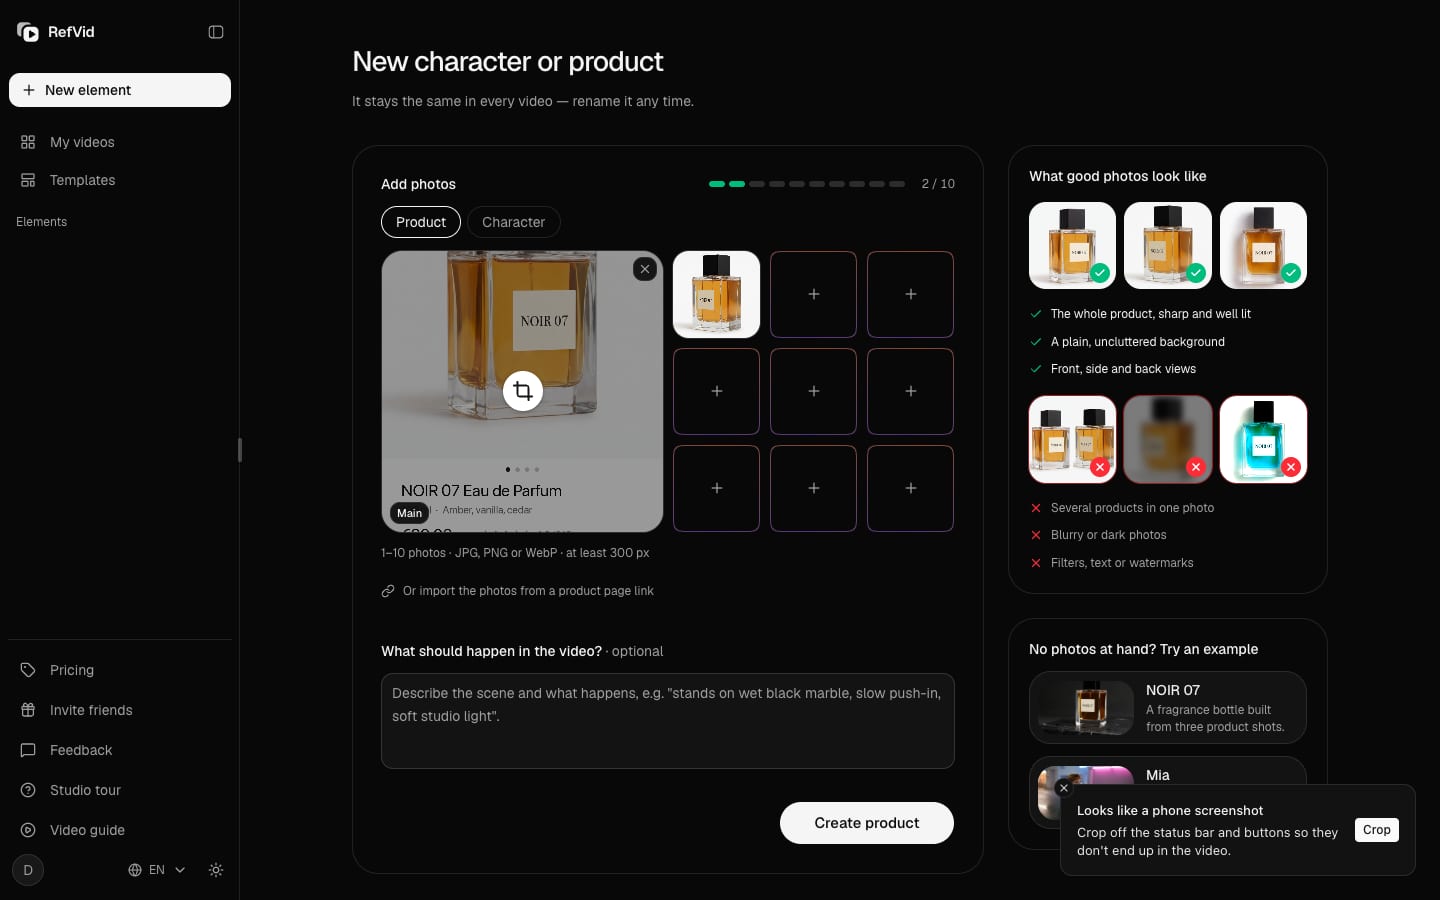
Point at a photo and click Crop
Crop sits in the middle of every photo tile when you point at it, not only the main one. The × that removes the photo stays in the corner.
- 3
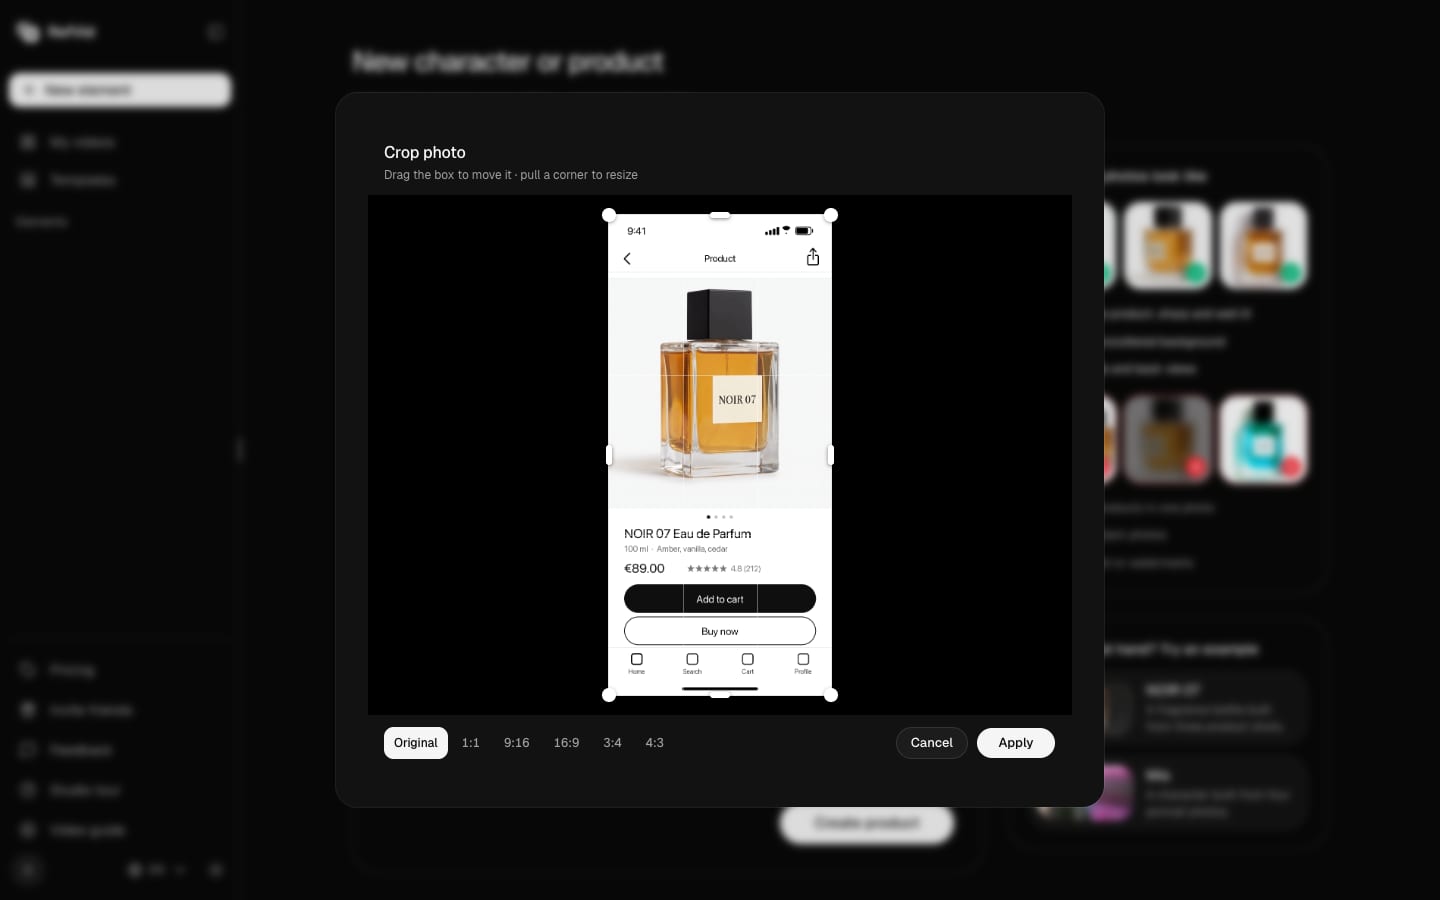
Start from the whole photo
The crop dialog opens on Original, with the box around the whole photo. Drag the box to move it; on Original a corner resizes it freely.
- 4
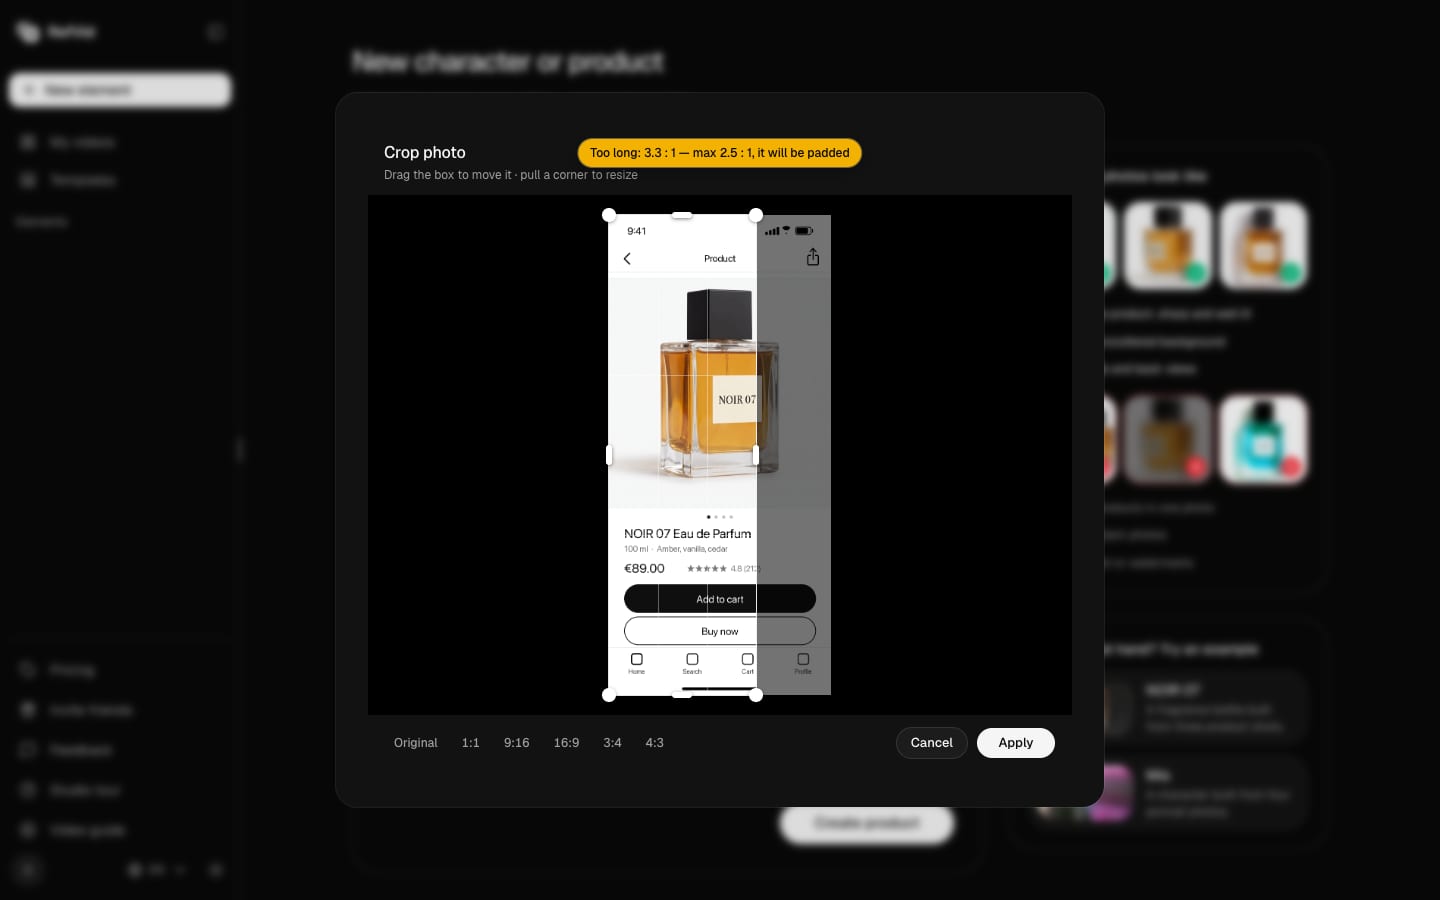
Mind the yellow note
Pull an edge to trim one side. A crop longer than 2.5 : 1 gets a yellow note that it will be padded; under 300 px it can't be applied. Back in range, the note fades.
- 5
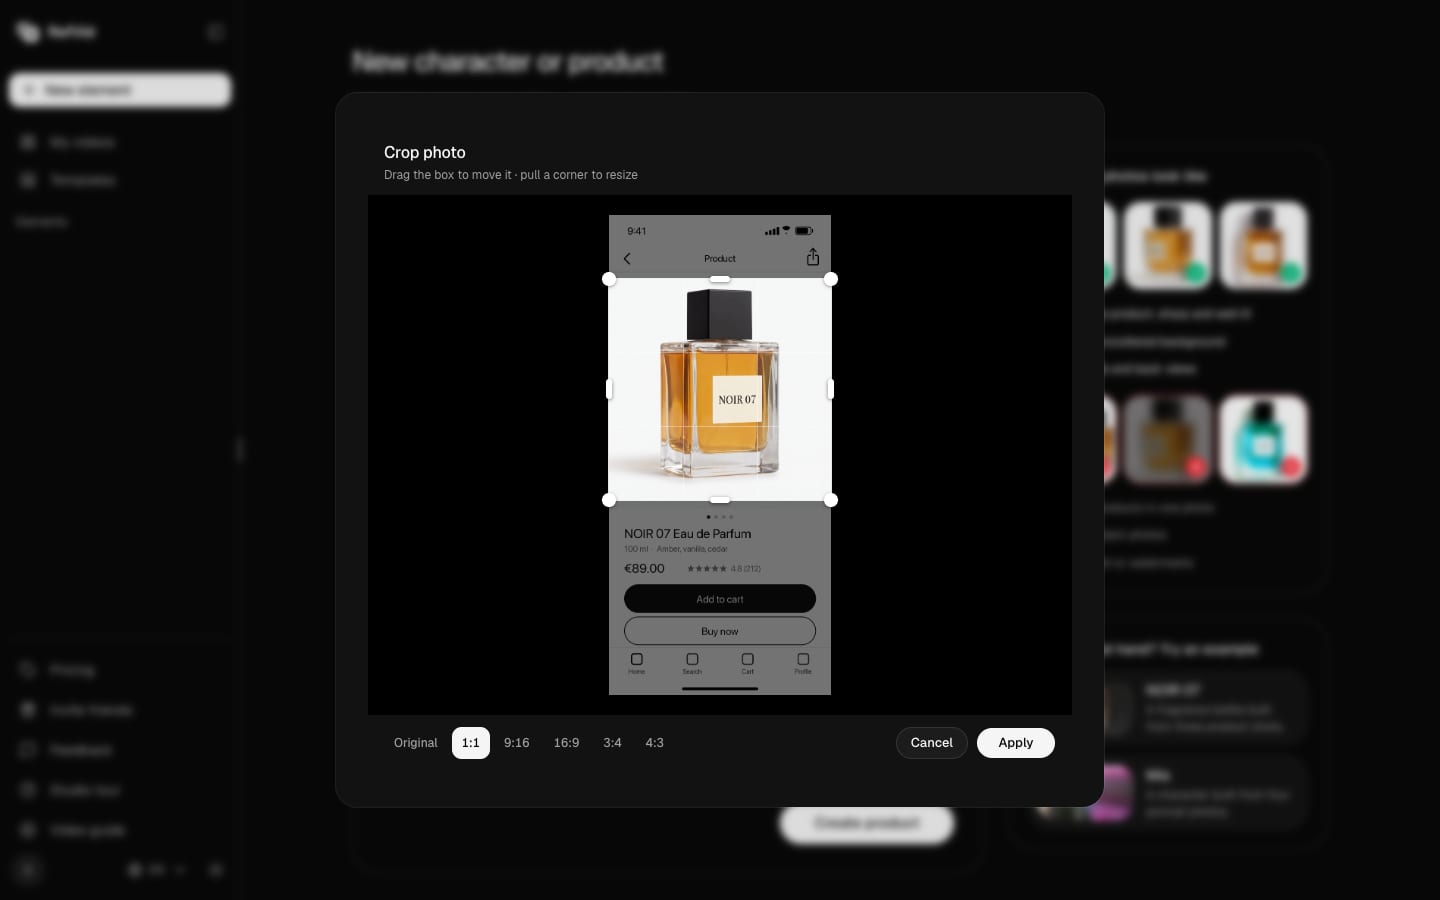
Pick a shape and frame the product
Choose 1:1, 9:16, 16:9, 3:4 or 4:3 and the box glides to that shape. Drag it onto the product; in a shape, a corner keeps the ratio, while an edge frees it and turns the shape off.
- 6
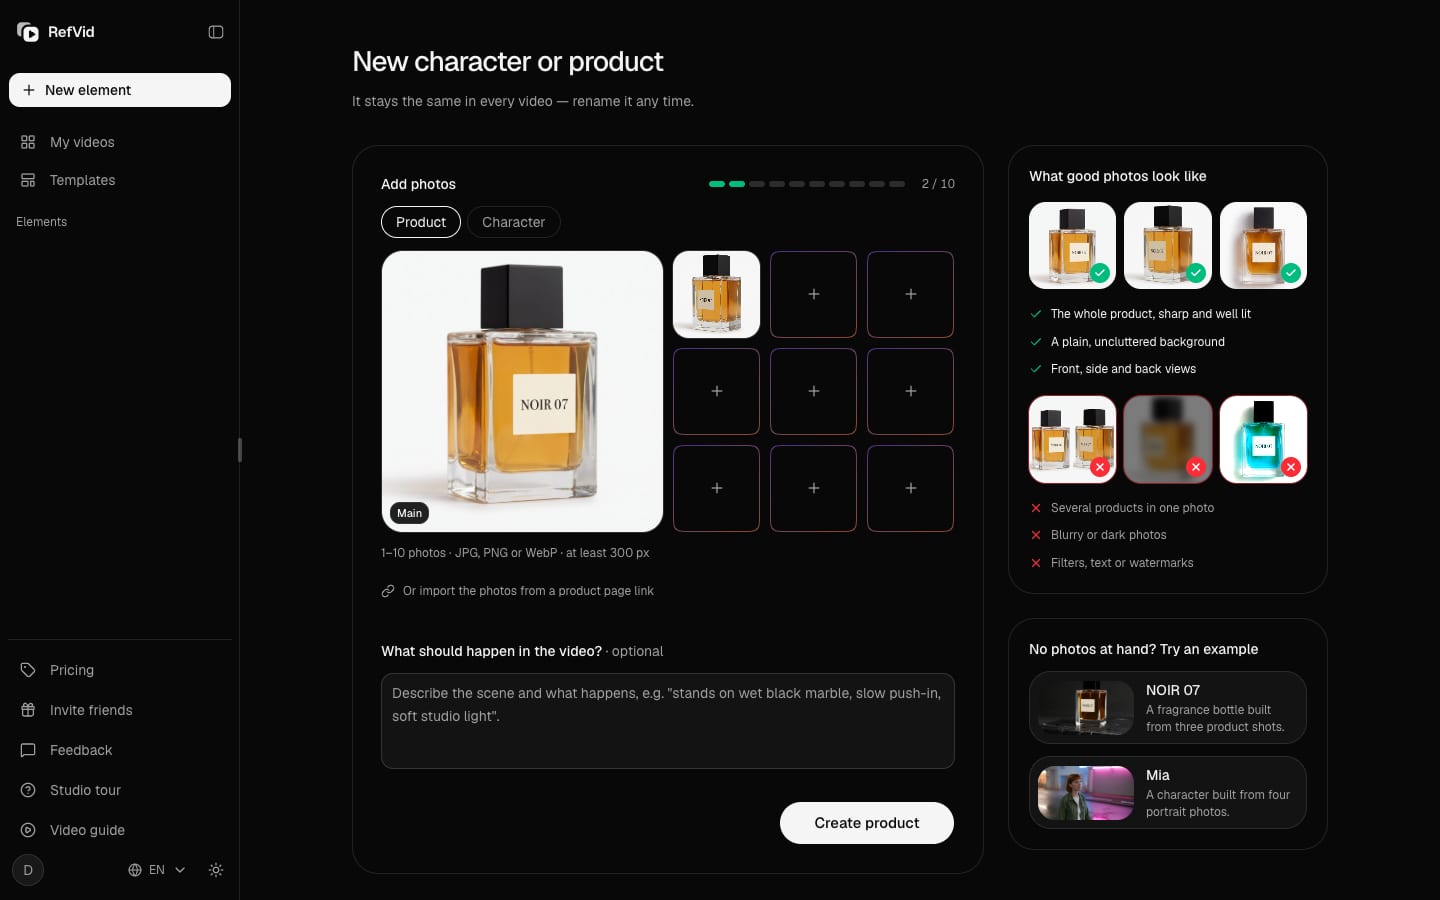
Apply
The cropped photo fades into its tile. RefVid keeps the original, and the video model sees the cropped photo.
- 7
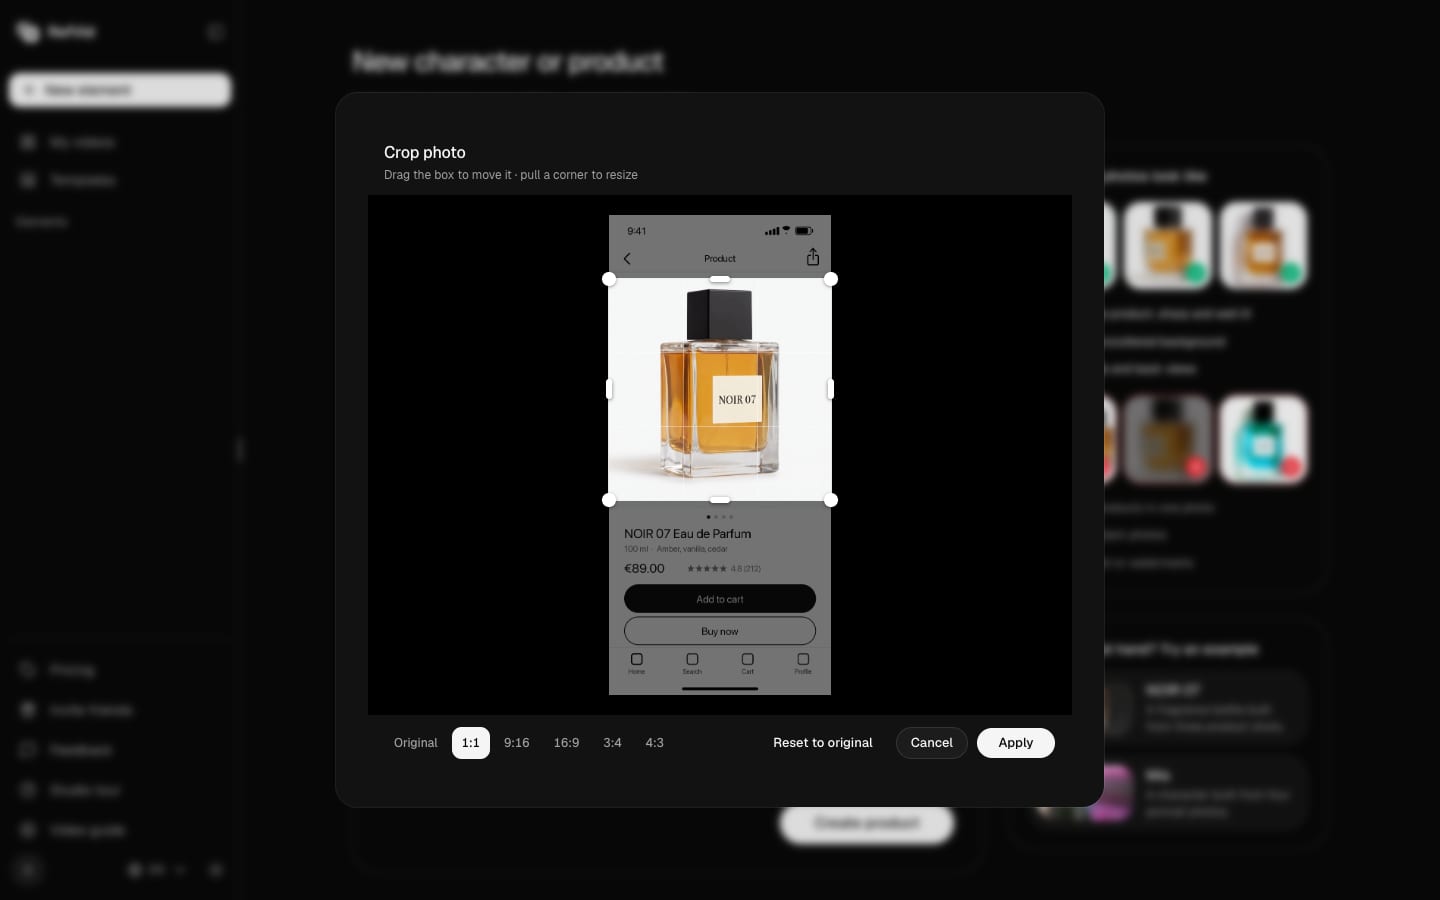
Reopen or reset
Crop again starts from the original, with your last crop on it; Reset to original brings the whole photo back. New element keeps the photos, the crop and your words across a page refresh.
- 8
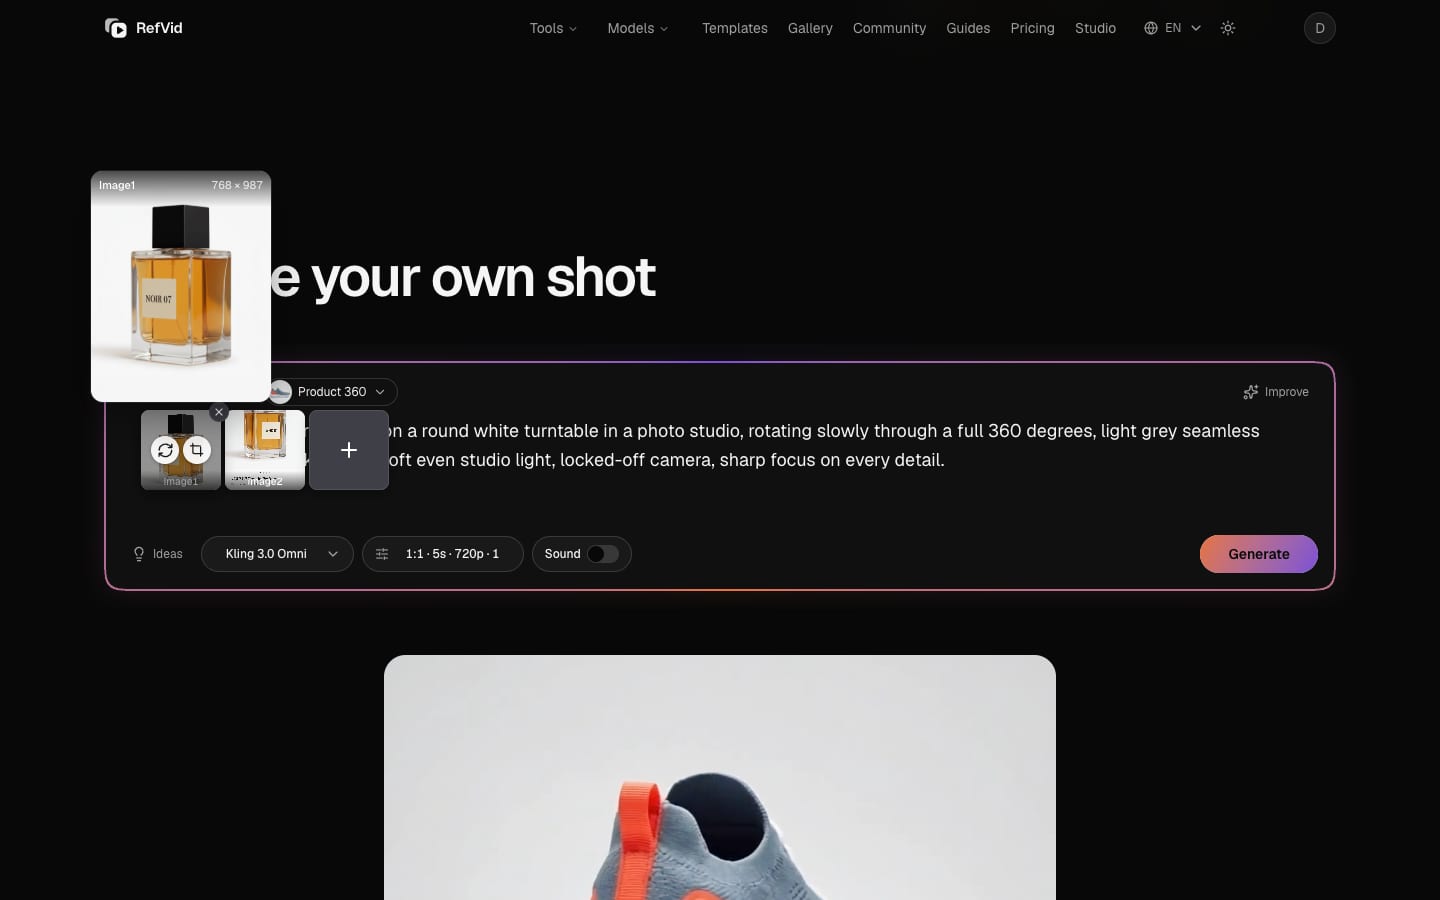
The same in the home page box
In the box on the home page, point at the photo pile to spread it out. Each photo has Replace and Crop side by side.
Transcript
A phone screenshot brings the status bar and buttons into your video. Crop it down to the product, right inside RefVid.
Open the studio and click New element. Add a product photo. This one is a phone screenshot, status bar and all. RefVid spots the phone shape and offers a crop right away. New: paste a picture straight in with Cmd+V.
Hover a photo: Crop sits in the middle, and remove stays in the corner. Every photo has it, not just the main one.
Click Crop. The dialog opens on Original: the whole photo. Pick a shape and the box glides to it: 1:1, 9:16, 16:9, 3:4 or 4:3. Back on Original, pull a corner: the box resizes freely, and Original turns off. Or pull one edge to trim just that side. Make it too thin, and a yellow note warns it will be padded. Back in range, the note fades away. For a product, pick 1:1 and drag the box onto the bottle. In a shape, a corner keeps the ratio.
Apply, and the cropped photo fades into the tile. Open Crop again: it starts from the original, with your last crop. Reset to original brings the whole photo back. Crop it again: pick 1:1, drag the box up, and click Apply. Clean product photo, back in the tile.
Describe what should happen in the video. Now refresh the page. The photos, the crop and your words are all still here.
The home page box has it too. Hover the photo pile to spread it out. On each photo, Replace and Crop sit side by side.
Try it now at refvid.com/studio. Thanks for watching. Subscribe for the next tutorial.
Templates from this tutorial
Each one opens in the studio with your own subject in it.
Read next
- How to take product photos at home, and use them as product reference photos for AI videoHow to take product photos at home with a phone: window light, a white sweep or light box, five angles, jewelry, Amazon rules, and video from the same set.
- How to choose reference images for AI videoHow to pick the best reference images from photos you already have: the five tests each image must pass, how to fill missing angles, and how many to keep.
- Product image to video AI: 5-second clips for your Shopify or Etsy shopYour own product photos as 5-second clips for Shopify and Etsy product pages and ads. Commercial use OK, no watermark, no subscription, credits never expire.
Questions
Does cropping change the video's aspect ratio?
No. A crop changes only the reference photo. You pick the video's shape separately, in the box's settings, so a square crop of the product can still become a vertical or a wide video.
Can I remove status bar from screenshot photos in RefVid?
Yes. Click Crop on the photo and frame only the product, leaving out the status bar, the app's buttons and the price; 1:1 suits most products. RefVid offers the crop by itself when a photo has a phone screenshot's shape.
Is the original photo lost when I crop?
No. RefVid keeps the original. Opening Crop again starts from it with your last crop, and Reset to original brings the whole photo back.
Why does the crop say it will be padded?
A crop longer than 2.5 : 1 is more stretched than the video models take, so RefVid pads it to fit. Widen the box or pick a shape and the note fades. A crop under 300 px can't be applied.