Ghost mannequin AI tutorial: front, back and side views from flat-lay photos
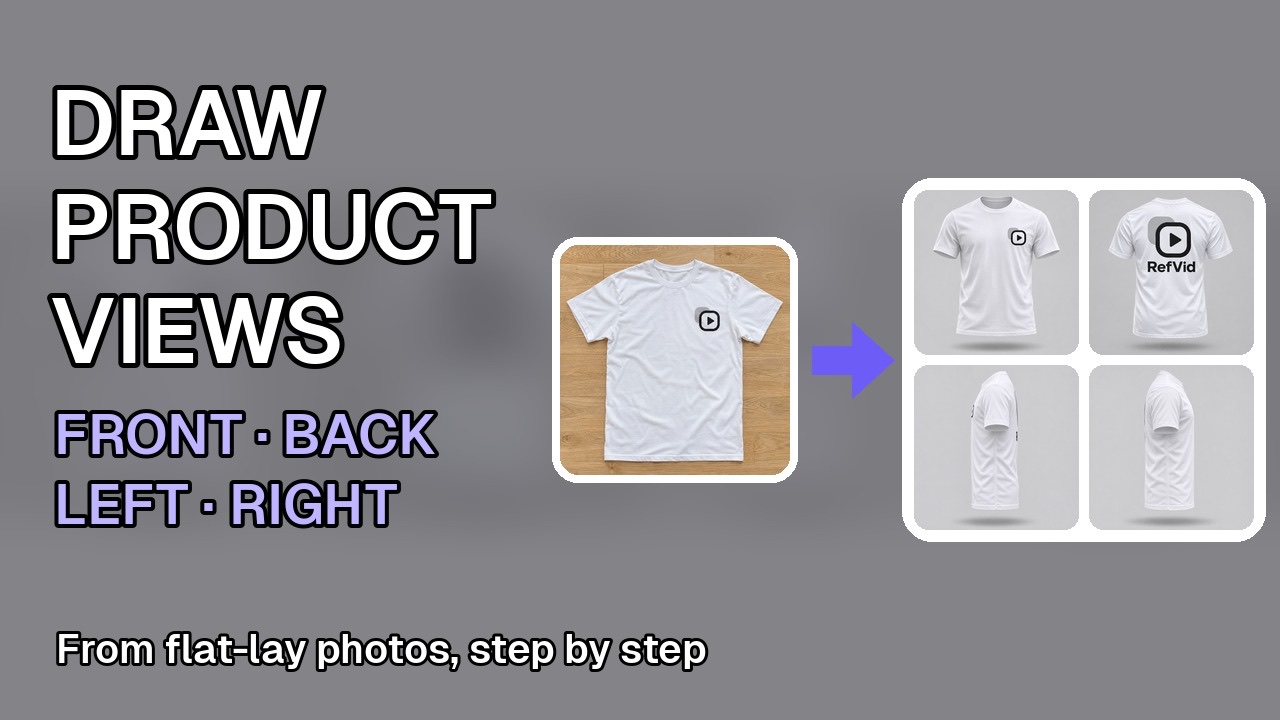
Opens the Floating Product template in the studio.
A ghost mannequin photo shows clothing as if worn by an invisible body: no model, no mannequin. A shirt photographed flat gives a video model little to go on, so RefVid draws these views from your flat-lay photos, front, back, left and right, and your product video has every side to work from. This two-and-a-half-minute tutorial follows one T-shirt from its two flat photos to a video template; every step is written out below with its own screenshot.
How to create ghost mannequin effect photos in RefVid
- 1
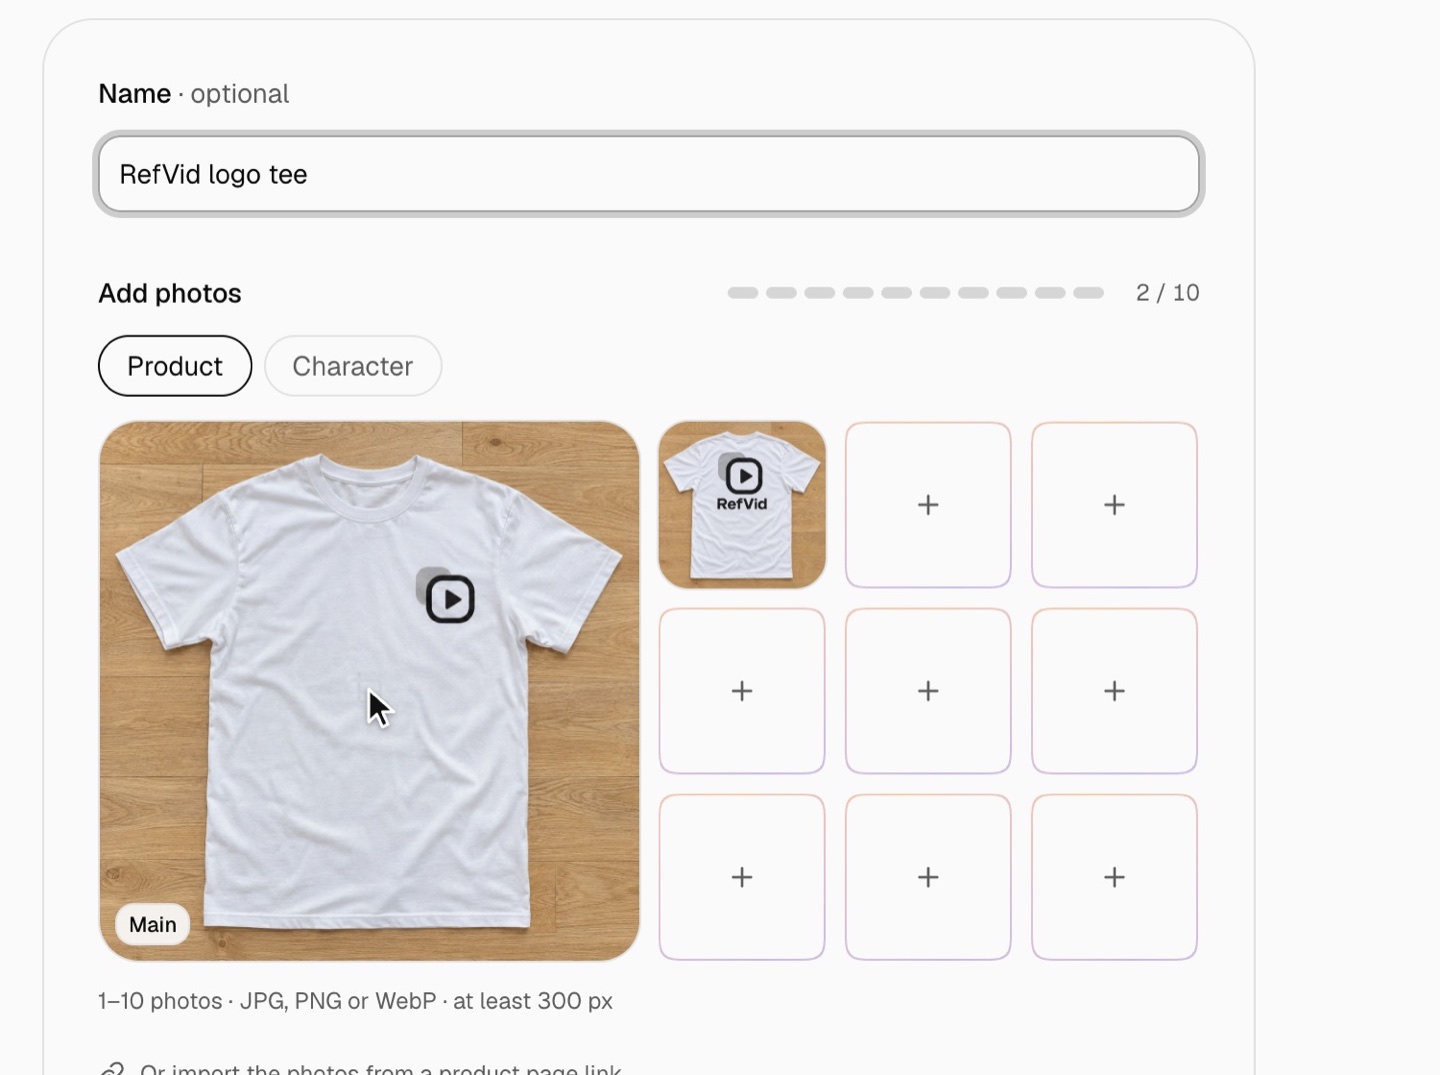
Add the shirt's flat-lay photos
In Elements, click New element, choose Product and add its flat-lay photos: the front first, then the back if it differs. Straight, evenly lit, the whole shirt in frame. Then click Create product.
- 2
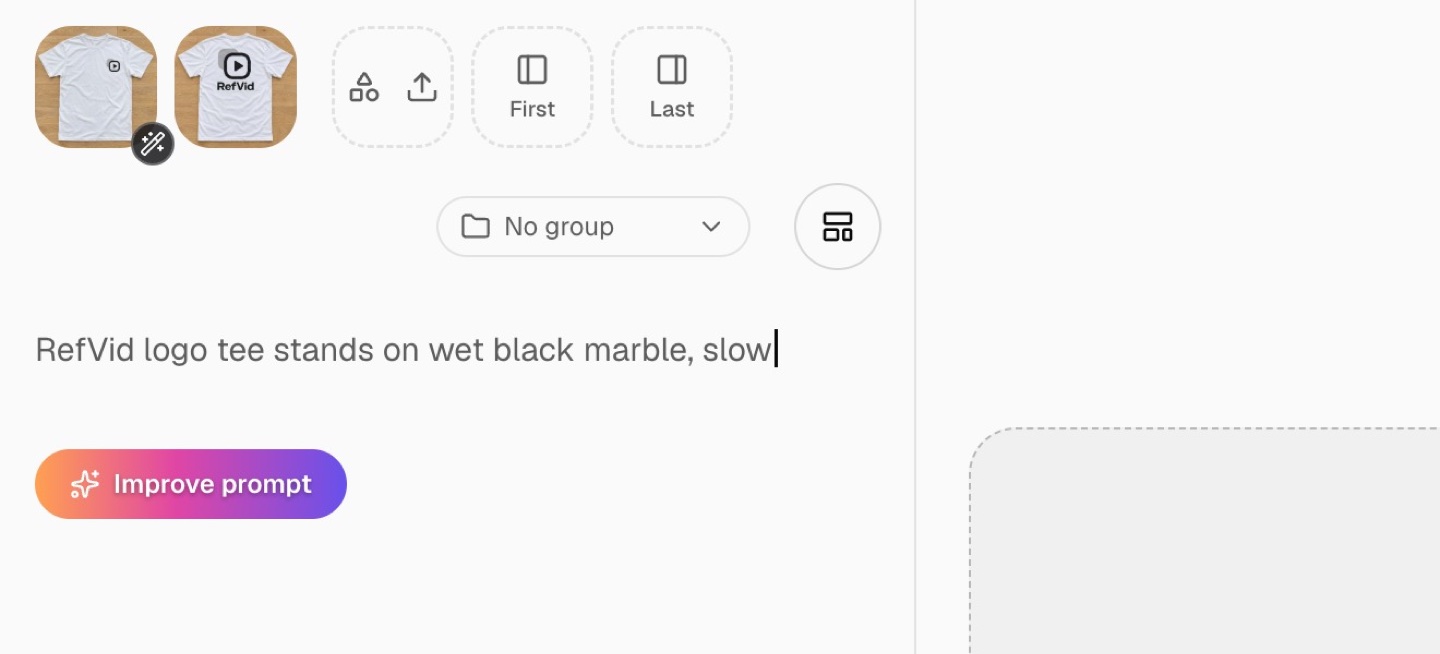
Click the wand on the main photo
Click New video: the product's photos are in the composer. Click the small wand on the corner of the main photo, or rest the mouse on it.
- 3
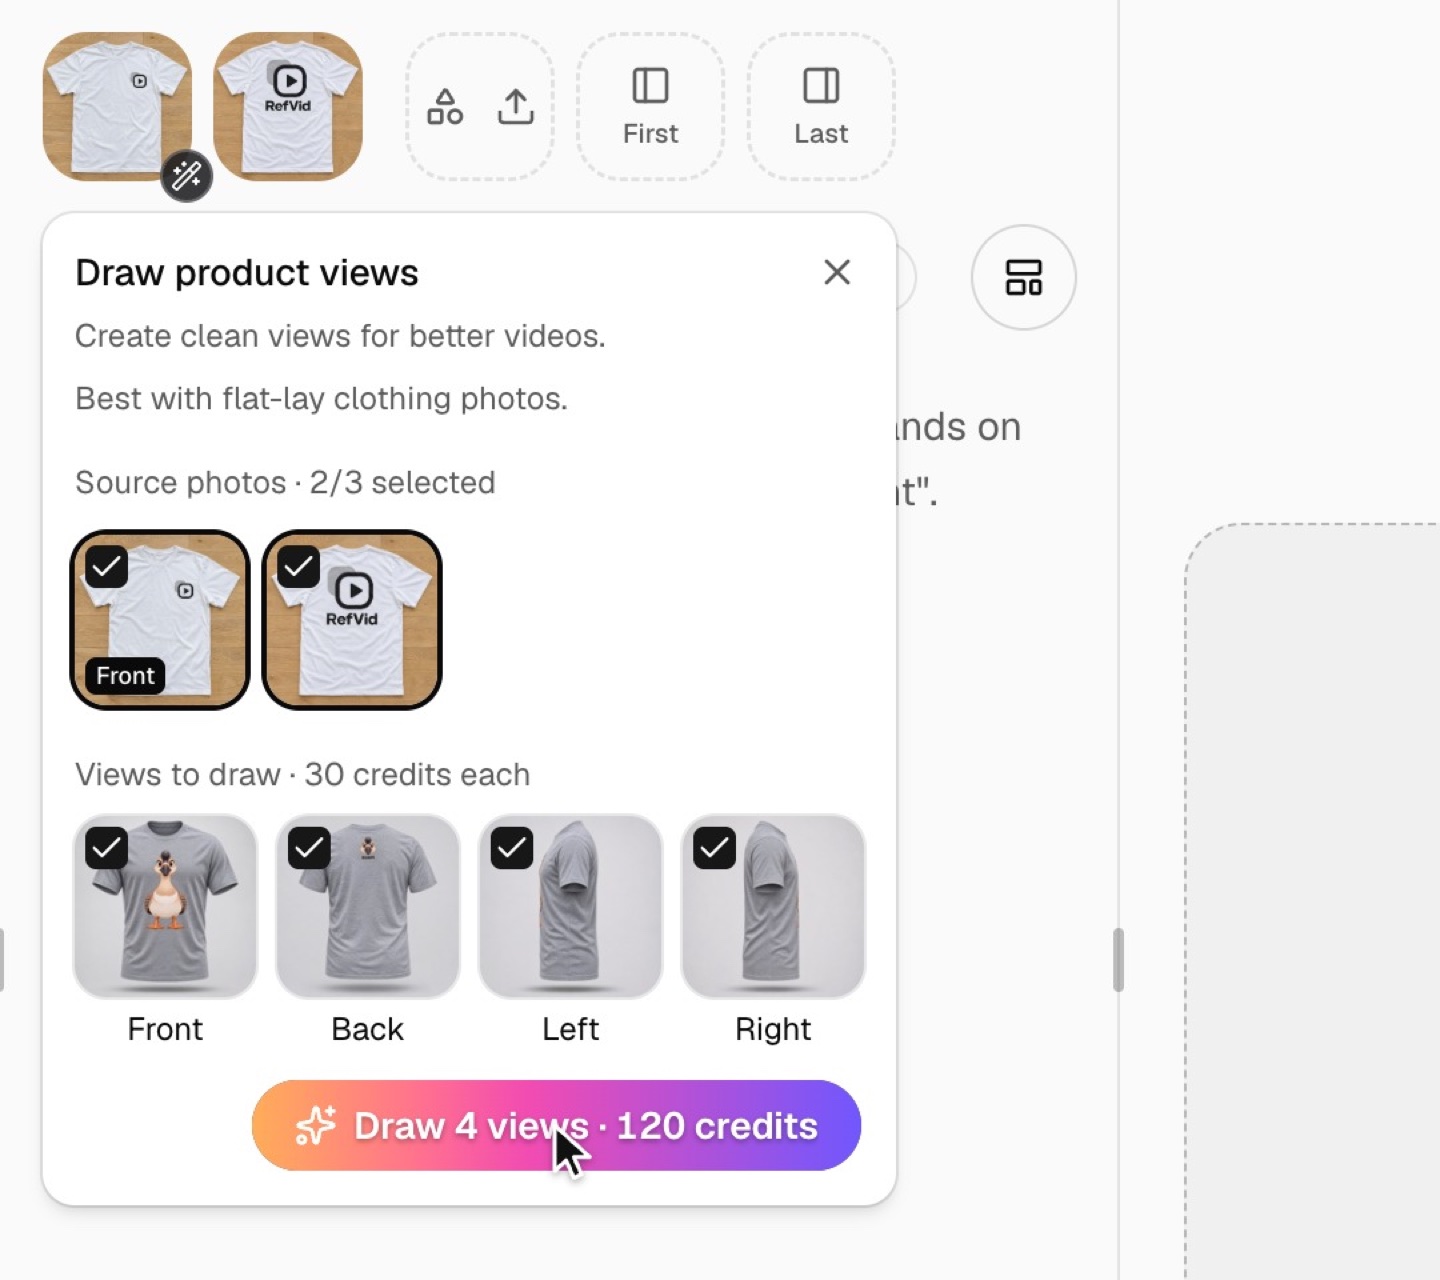
Tick the photos and the views
The Draw product views card opens. Up to three source photos go in, and the first ticked one is the front. Tick the views you want: front, back, left and right, 30 credits each. The button shows the total; click any picture to see it large.
- 4
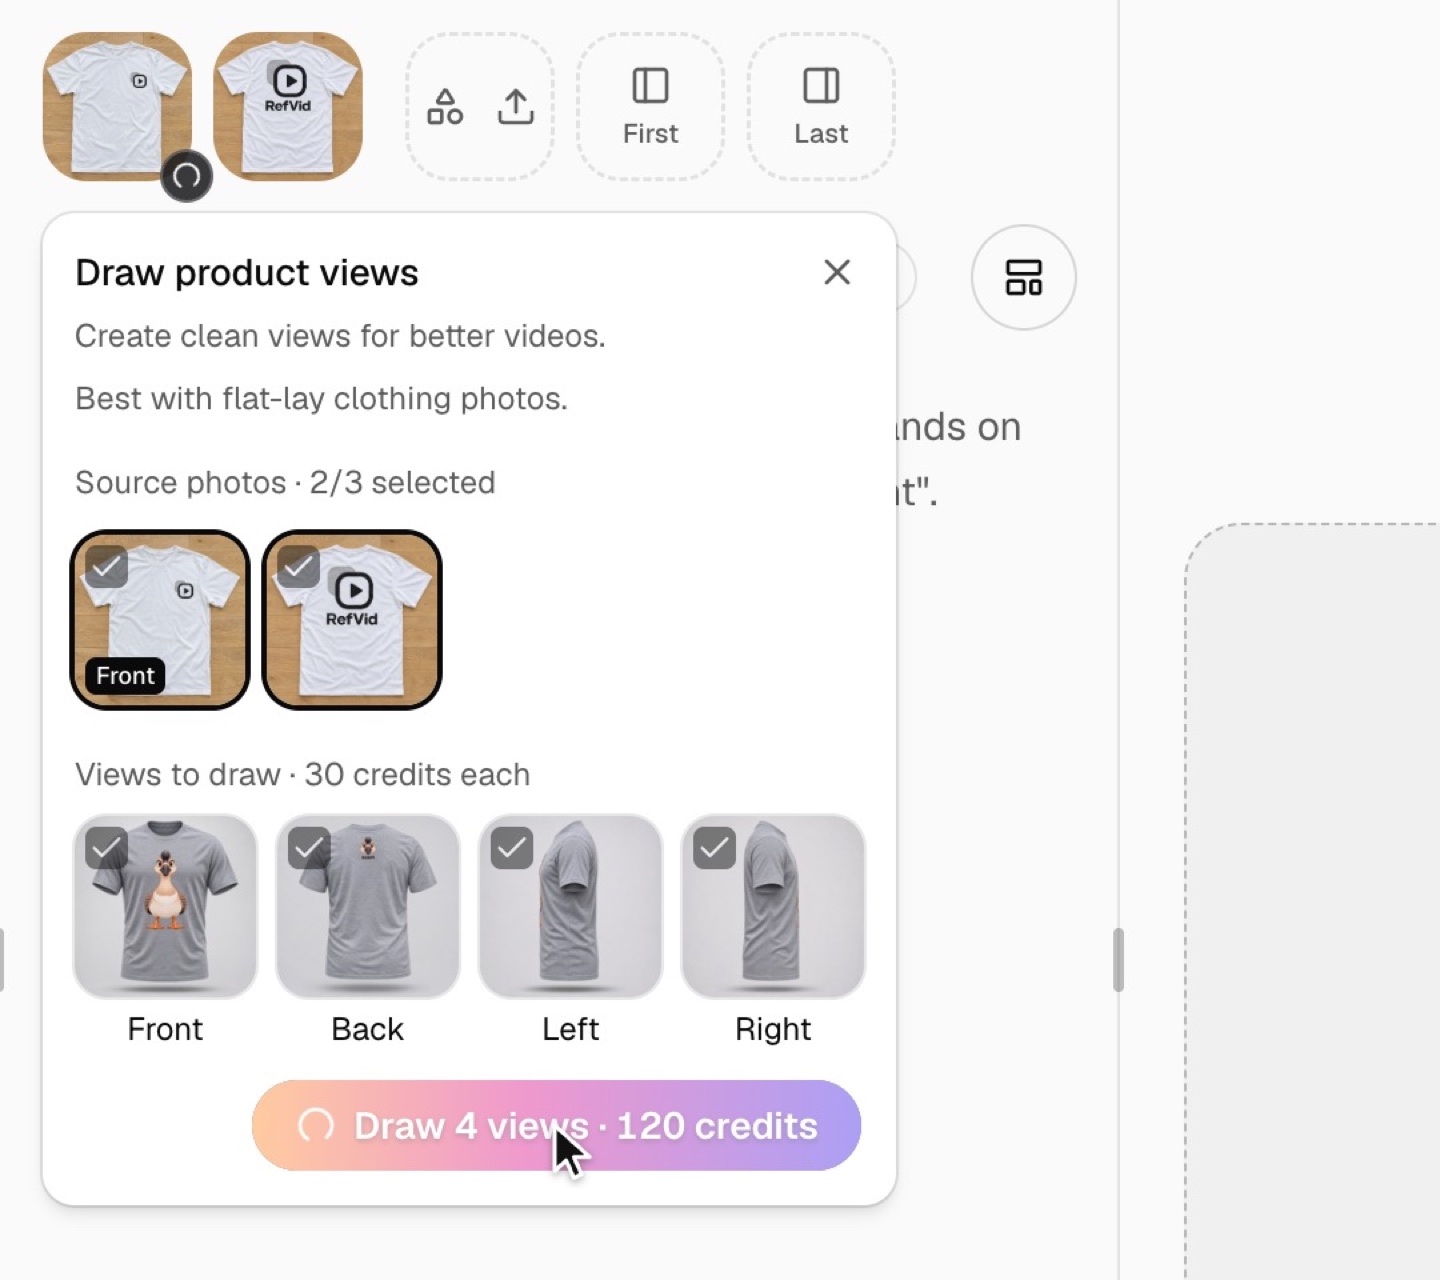
Press Draw
The button and the wand on the main photo spin while the views are drawn, about a minute for four. You can close the card meanwhile. A view that could not be drawn gives its credits back.
- 5
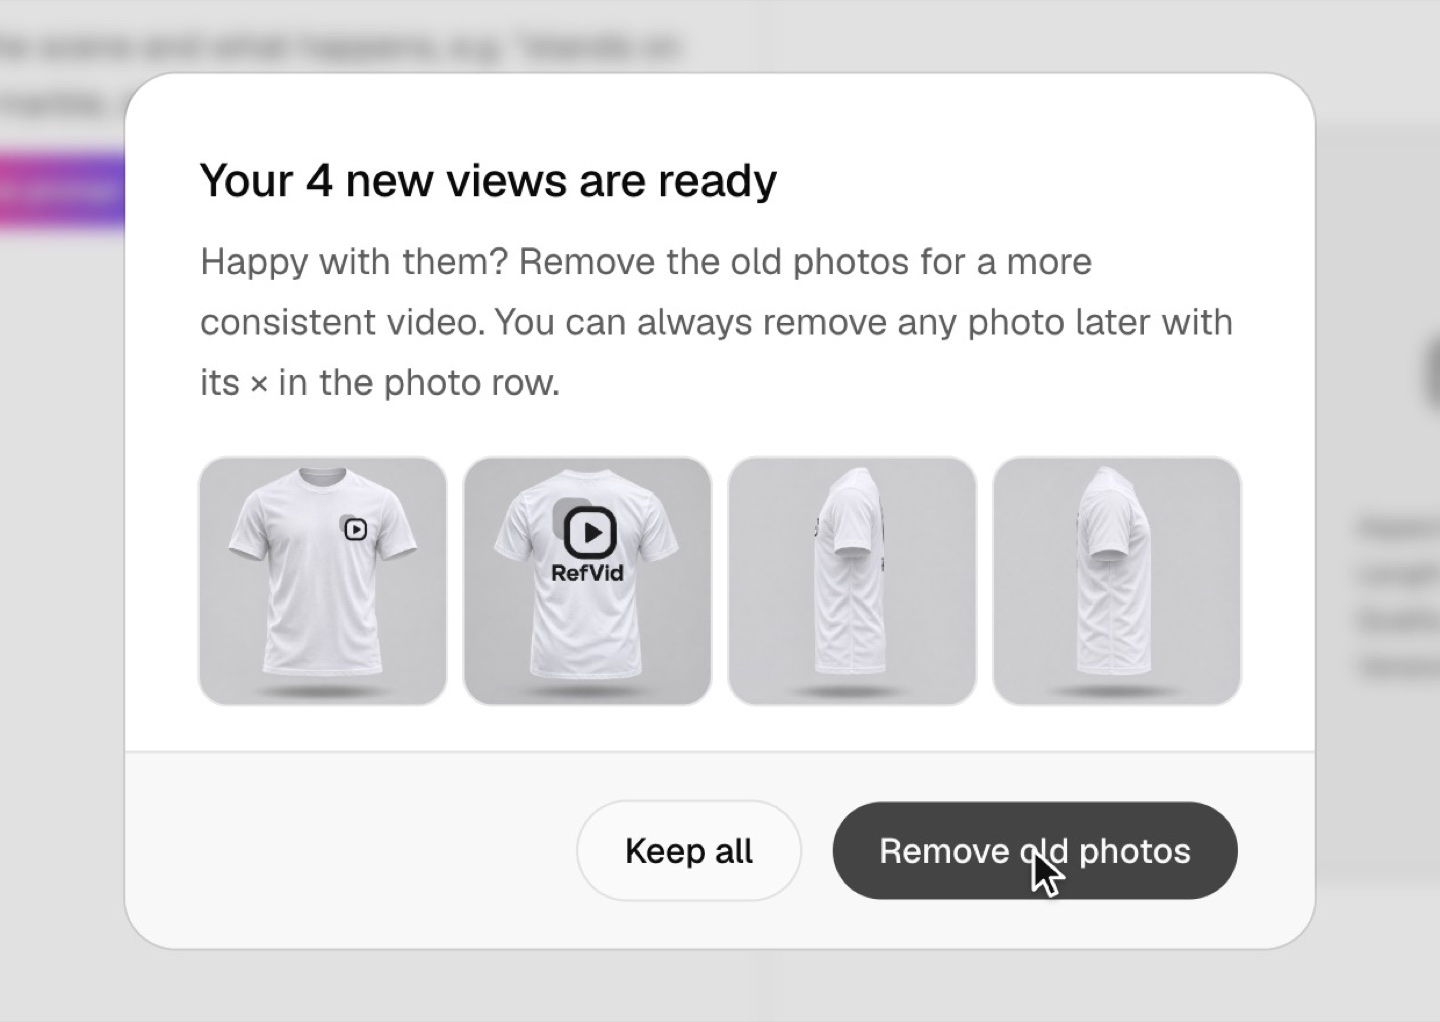
Remove the old photos
RefVid asks whether to remove the old photos. Press Remove old photos: the two flat photos leave this video, so the video model only sees the clean views and the shirt keeps its shape. They are deleted from the product, so every later video starts from the views too.
- 6
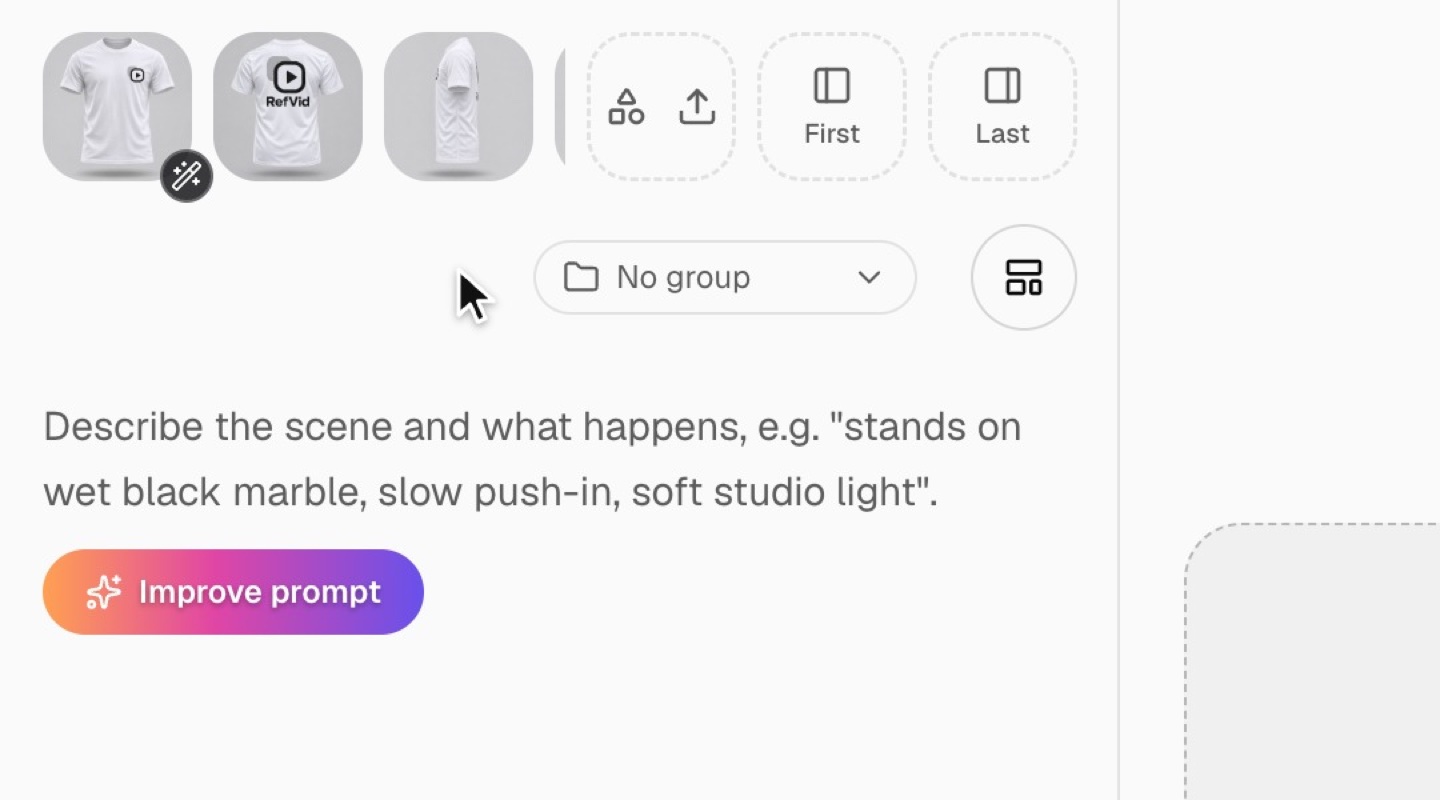
Only the views stay in the row
The photo row now holds just the four studio views; scroll it sideways to see the last one. Any view you do not want can go with its ×.
- 7
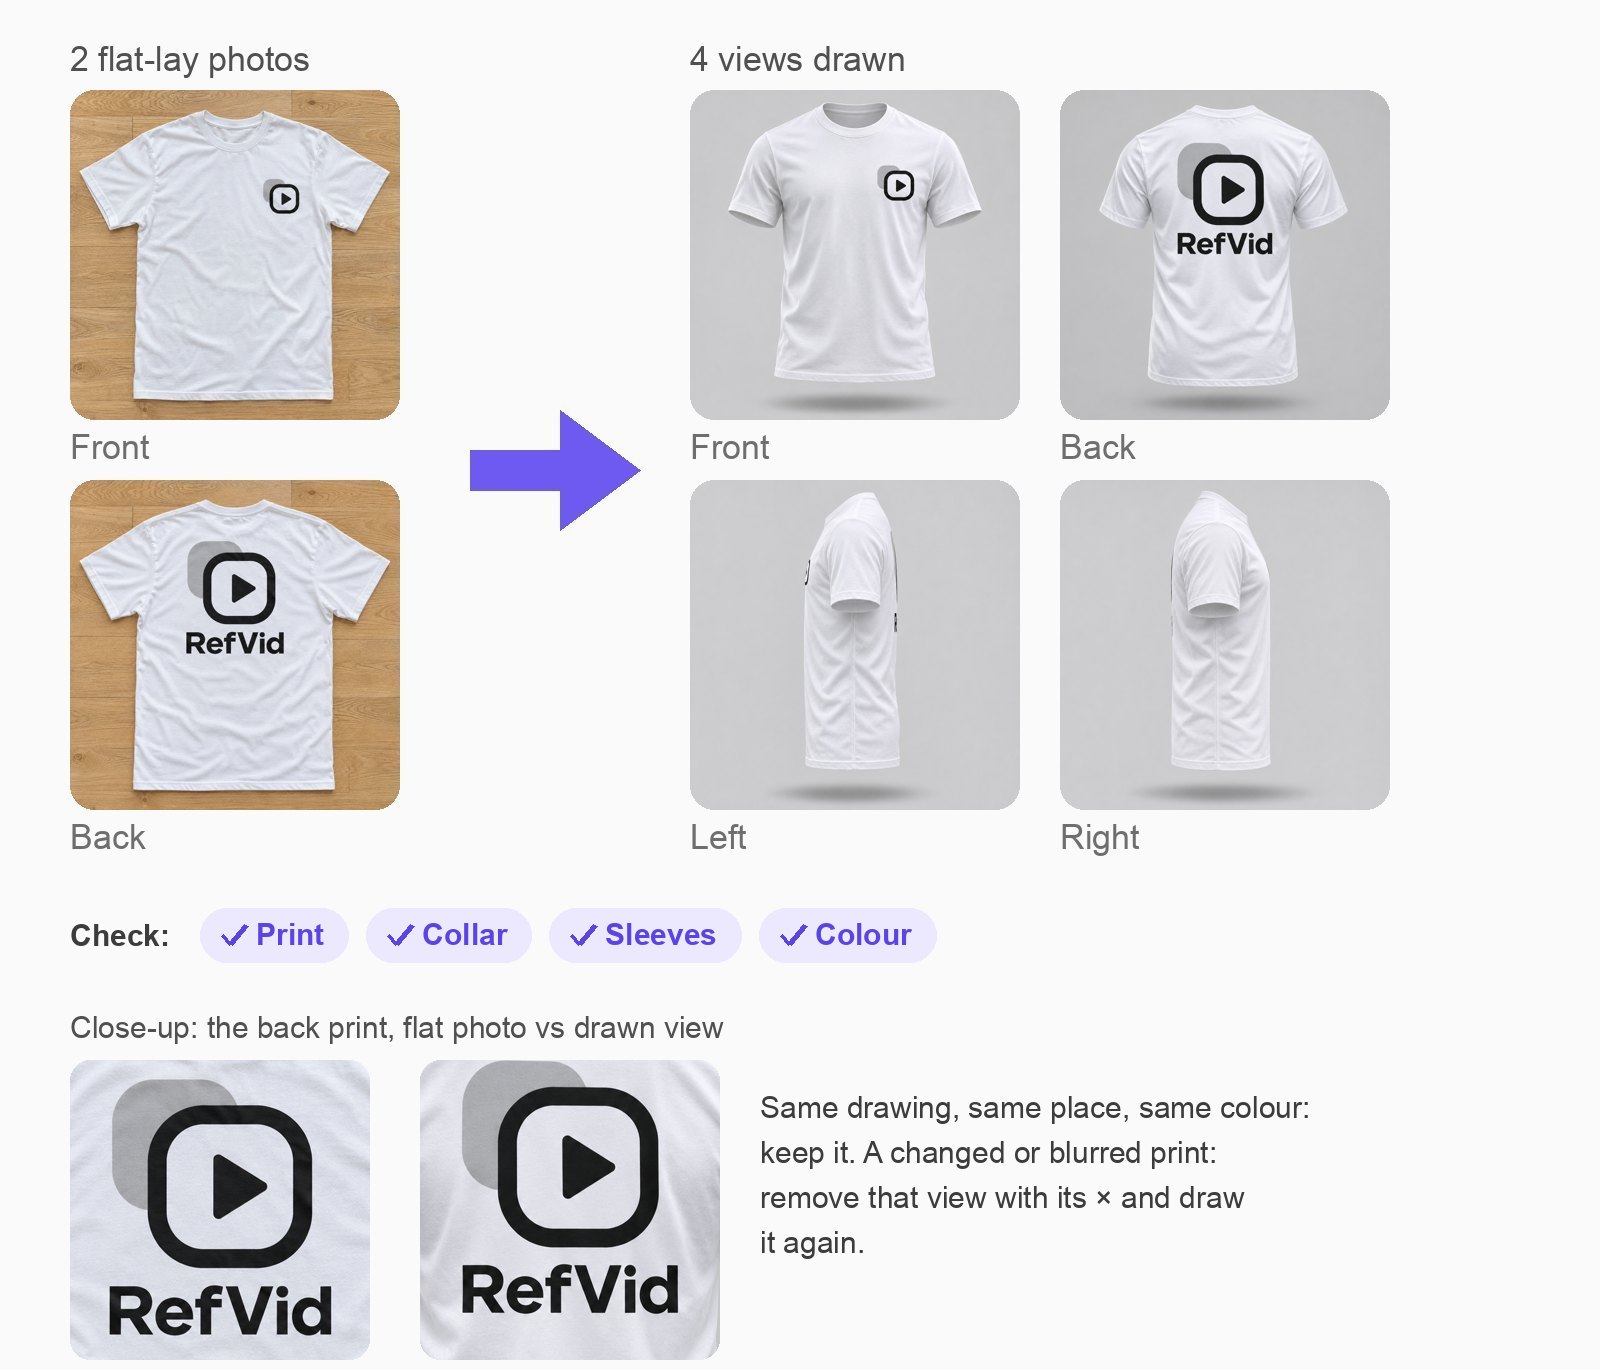
Check the views against your photos
Compare each view with your flat photos: the print's drawing and place, the collar, the sleeves and the colour. Keep the ones that match. To redo one, remove it with its × in the photo row, then tick just that view in the card and draw it again (30 credits).
- 8
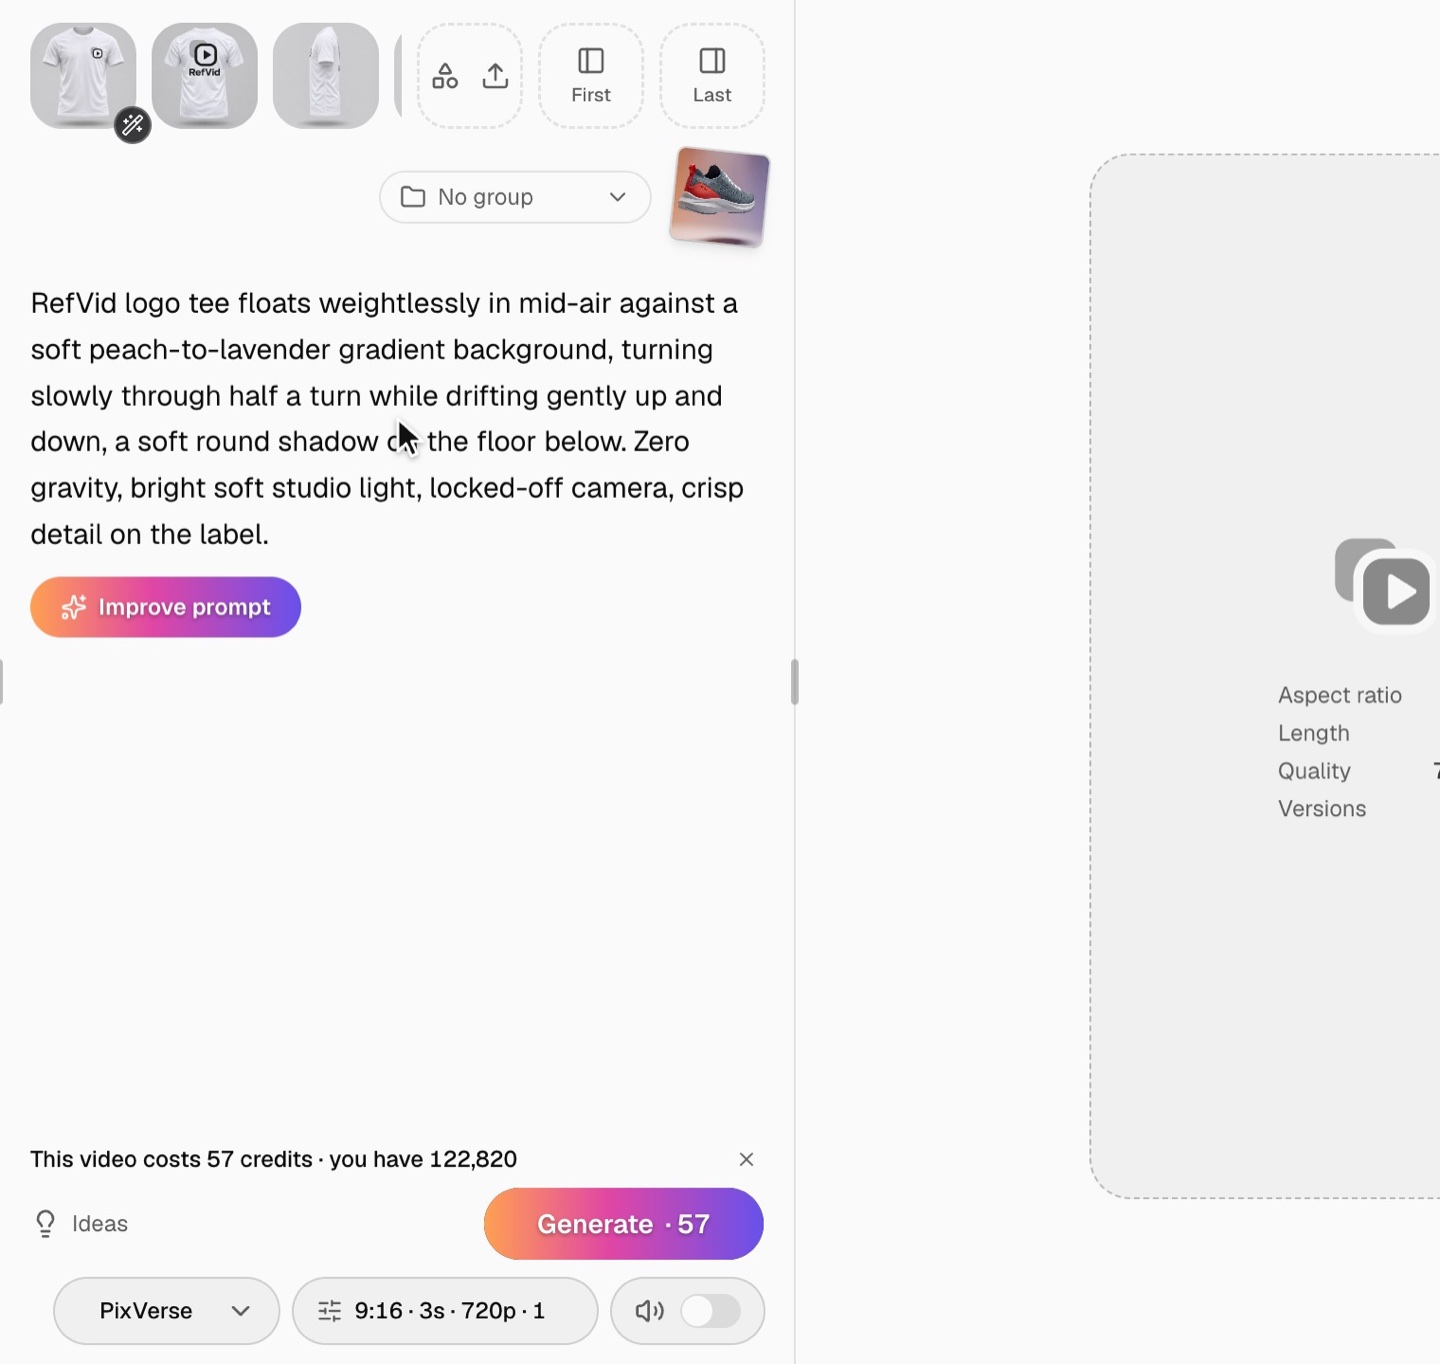
Use them in a video template
Click Select template, search for floating product and use it: the four views stay in the photo row and the template writes the prompt. The 360 turntable works the same way. Check the prompt, then press Generate when you are ready.
Transcript
Flat-lay photos show a shirt lying flat. RefVid draws clean studio views from them, for a steadier product video.
Open Elements and click New element. Give the product a name. Add flat-lay photos: the front first, then the back. Then click Create product. RefVid opens its page.
Click New video. The two photos are in the composer. See the small wand on the corner of the main photo? Click it.
Source photos: both are ticked. The first one is the front. Views to draw: front, back, left and right. 30 credits each. Click a picture to see it large. The button shows the total: 4 views, 120 credits.
Press Draw. The button and the wand spin while the views are drawn. RefVid asks whether to remove the old photos. Press Remove old photos. The flat photos are deleted from the product, so every video now sees only the clean views.
Now pick a template: click Select template and search for floating product. Use the floating product video. The four views stay in the photo row, and the template writes the prompt. Check it, then press Generate when you are ready.
Each view costs 30 credits, and a view that fails gives its credits back. Best for T-shirts, sweatshirts and printed tops. Tiny text or busy patterns can come out softer.
So: add the photos, click the wand, press Draw, remove the old photos, and pick a template. Try it now in the studio. Thanks for watching. Subscribe for the next tutorial.
Read next
- How to take product photos at home, and use them as product reference photos for AI videoHow to take product photos at home with a phone: window light, a white sweep or light box, five angles, jewelry, Amazon rules, and video from the same set.
- How to choose reference images for AI videoHow to pick the best reference images from photos you already have: the five tests each image must pass, how to fill missing angles, and how many to keep.
- How to keep outfits consistent across AI video clipsWhy clothes change between AI video clips and how to stop it: full-outfit reference photos, simple garment rules, pattern and color tips, one set per outfit.
Questions
What is ghost mannequin AI?
AI that makes the invisible-mannequin look of clothing photos: the garment filled out as if worn, with no person or mannequin in the picture. RefVid draws it from your flat-lay photos, in four views: front, back, left and right.
Flat lay to ghost mannequin AI: which photos do I need?
A flat-lay photo of the front, laid out straight and evenly lit, and one of the back if it has its own print; without a back photo the back is drawn plain in the shirt's colour. A close-up of a label or print can be the third. Up to three photos are used, and the first ticked one is the front.
How much does drawing the views cost?
30 credits a view: one view is 30, all four are 120. The button shows the total before you press it, and a view that could not be drawn gives its credits back.
Will the print on my shirt stay the same?
Each view is drawn to keep the print as in your photos: the same drawing, colours and place. Very small text or a busy all-over pattern can come out softer, so look at the views first and remove any you do not want.
Does it work for products that are not clothing?
Yes. A product that is not worn, such as a bottle, a shoe or a box, is drawn floating upright in the same light grey studio, front, back and sides.